Abigail asked why I had something against button plackets. Other than the fact that I don’t like them, I’ve had trouble documenting their existence. I’ve doublechecked since I first responded to her comment, and while there are certainly a number of paintings depicting a sectioned-off part of the front of the subjects’ doublet or jerkin -- the research of the inestimable Janet Arnold (Patterns of Fashion 1560-1620) indicates to me that by and large these were sections of the front pieces separated by parallel lines of decorative trim rather than separately-cut and then sewn-on pieces.
That being said, if you're planning to do your buttonholes on a machine, it's a heckuva lot easier to feed a placket piece through the needle and then sew it on. You can always disguise the seam with trim if you're doing something upper to middle class in your design. If it's peasant wear, I think they did it anyway they could make it work, and you can feel free to quote me on that... not that it would necessarily persuade anyone, but sometimes it helps to know you have company.
While I’ll never be one to claim that any one historian’s findings are definitive (so very few period garments have survived into the current era for us to study) I’ll stand by this assertion. It has been noted that of the surviving garments from the Mary Rose, no two were assembled in quite the same manner.
So I am left with an aesthetic decision, doing what feels right.
(shrug)
On Page 55 of my copy of Patterns of Fashion is a simple man’s doublet circa 1574, the Cosimo de’Medici doublet. I have decided to base my new doublet on this one. It has all the features I desire: simple lines, a cut-work edging treatment similar to the one I already used to adorn the collar of the rust jerkin.
I’ve been tinkering with my pattern almost non-stop and I am still frustrated by the wrinkle in the collar. I think I may be simply too thin or too long of neck (or God knows what) to get it to fit properly. Old Cosimo was apparently a pretty stocky guy. Unfortunately, the collar in POF is of the type I’ve been wrestling with and - frankly - I’m tired of messing with it. I need to do more research, consult some experts, and maybe make another three or four muslin mockups, but I want to get moving on the rest of this project… so I’ve decided to scrap that part of the plan and move ahead while I do separate experiments.
Yup, it didn’t work, so I’m going to change it. Artistic license. Later in the period, there were plenty of doublets made with separately-pieced collars, so I shall go and do likewise. They call that “rationalizing” I think. Perfectly healthy. Nothing to worry about.
(ahem)
TODAY’S TIP: If you hit a wall, there might be better ways to circumvent it than to keep banging your head against it. Don’t be afraid to change your original idea or to scrap the project and start over. It’s okay to admit you’ve bitten off more than you currently have time to chew. It’s okay, save some for later. It’s not as though this is your last project. If you can’t do it today, something you learn tomorrow might make it easier.Freed of the need to mess around anymore with that daggum collar, I’ve managed to build the body of the doublet.
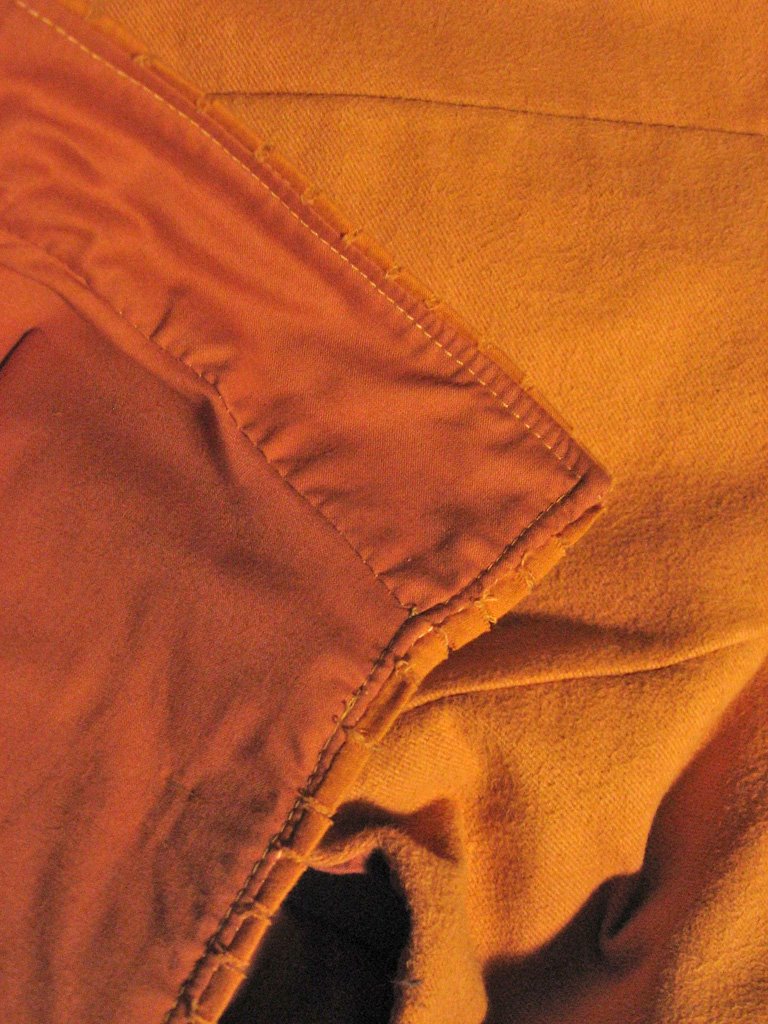

Here’s a closeup of the collar. Note that I flat-lined the doublet entire in butterscotch cotton. Remember that for the most part, this doublet needs to be wearable during the height of summer. (It's about time I had something that was)


Come to think on it, this also shows how desperately I need to build some more bookshelves. Another tip... sometimes you don't really see something unless you're looking at a picture of it.
Alas, a project for another day.
By The Way...
October marks the One-year anniversary of the creation of this blog. Whoopee!! Thanks to everyone who has been quietly frustrated with my procrastinating this past year. I'll try to do better in year two.
Incidentally, one year ago today I was the first day I first wrestled with that damn pucker on the rust-colored jerkin!
Aha. I am enlightened.
ReplyDeleteLovely close up shots of the doublet! Is that your stitching on the edges, or machine? If it's yours I shall simply go hang myself. It's splendidly even!
Hah. I read about your collar adventures... I'm making a quilted garment myself, and although my mother (a quilter) insists that I need to make allowance, I can't stand the thought of alot of extra fabric. So we'll see how that goes...
Some of its mine, some is the machine. If you mean those even, straight stitches along the edge, those are the machine, so you're safe. I'll go back and cover them with a line of embroidery maybe... eventually.
ReplyDeleteThe final noble garment will not have any visible machine stitching. Just because I'm a masochist, I suppose.
Fair warning... your mom's right about the extra fabric. My wife (she's a quilter too) warned me and I ended up pulling many rows of stitches when I made the collar (luckily the only quilted bit of the garment) of the rust doublet.
The quilting stitches pull the fabric down into the troughs and each row takes up a smidgen of your overall fabric width, which adds up amazingly fast! If you're not careful you could end up with a startlingly accurate scale model of what you wanted to be full-size. (Urk!)
Scott