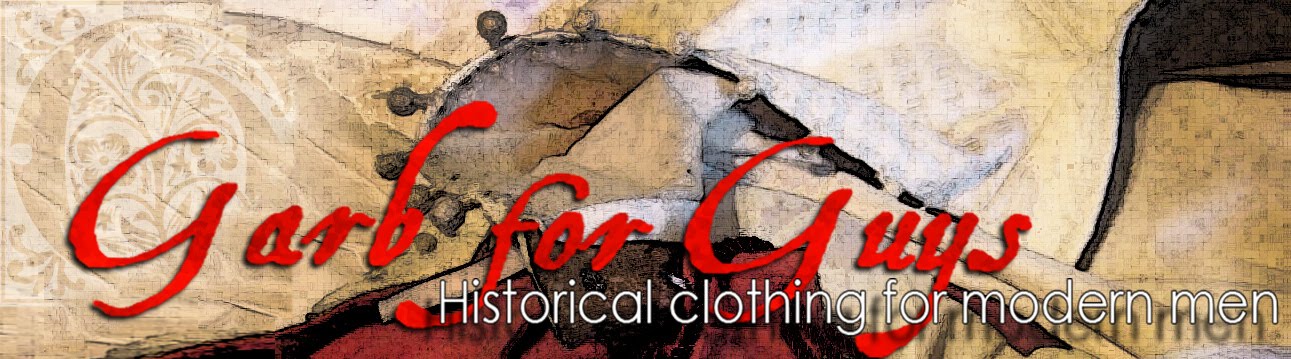

I finished the rows of straight chain stitches on the panes and I've assembled the sleevelets. Below is a pic of the cuff with the panes sewn into it before I turned it and tacked it down. The cuff piece has a arch to it, which is why I clipped the edges prior to turning as you can see.

The dark burgandy layer is the canvas I used to interline the pieces. Yes, I know, I said something heartfelt in a previous post about interfacing being easier than interlining. Keep in mind the other things I said about only using modern conveniences where I can get away with it. In this case I think that modern interfacing would make the lines too stiff and starched-looking. Since an interlining is essentially only attached where the stitches hold it, it can give pieces like the panes and cuff of my sleevelet structure without forcing them to hold thier shape to an almost starched extent.

Trimmed and turned. At the moment it's just pinned together to check the shape and see if adjustments need to be made before there are too many seams to pull.

This is the scrye where it will eventually be joined to the body of the doublet.
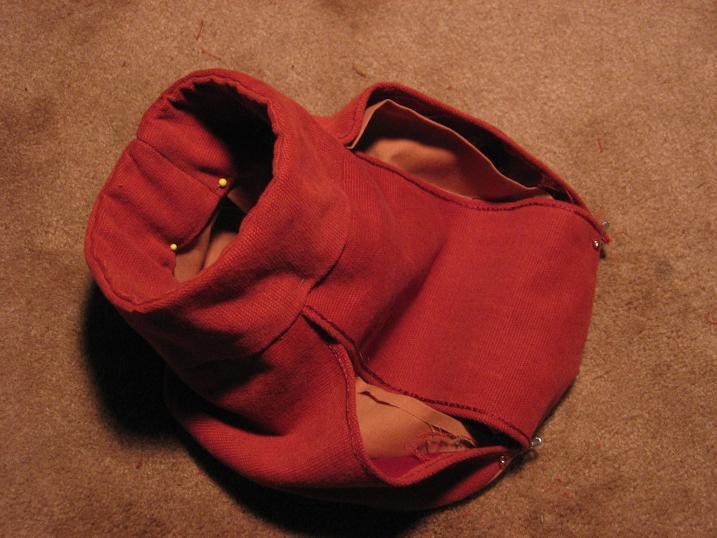
Since I've never made a sleeve treatment such as this one, I thought it meet that I should pin and pose, trying out the thing and making 99.9% sure I got it right before I actually sewed it on. The sleeves of the doublet will be laced on, because I prefer that method overall, but in the Moroni painting the jerkin I am copying looks like it's been sewn into the armscrye. This is unusual according to most of my reading, but the painting shows no visible signs of lacing or points holding the sleevelets in place, so neither will this jerkin - or the final one.
Note: I didn't have one of my usual 'renaissance shirts' handy, so I'm wearing a white dress shirt in these photos. It doesn't really matter because at this point I'm just testing the angle. The 'bulky armpit' tests will come later when it's tacked on a little more securely and I can get a real feel for how it will go. The nice thing about panes is that they can be moved to expand or contract around as much or as little thickness of fabric as I am likely to find going through that armhole anytime soon.
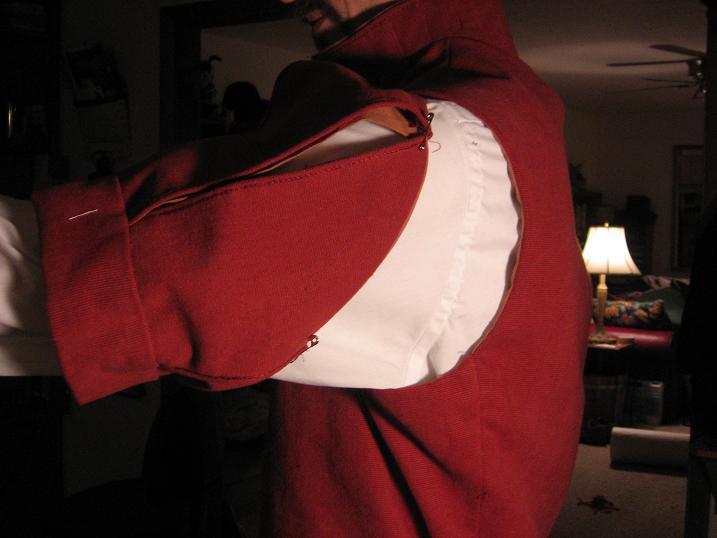
At Extension
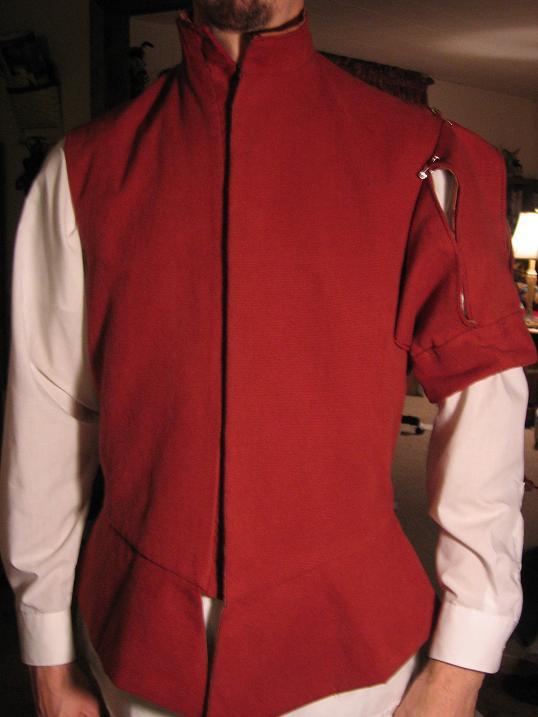
Front
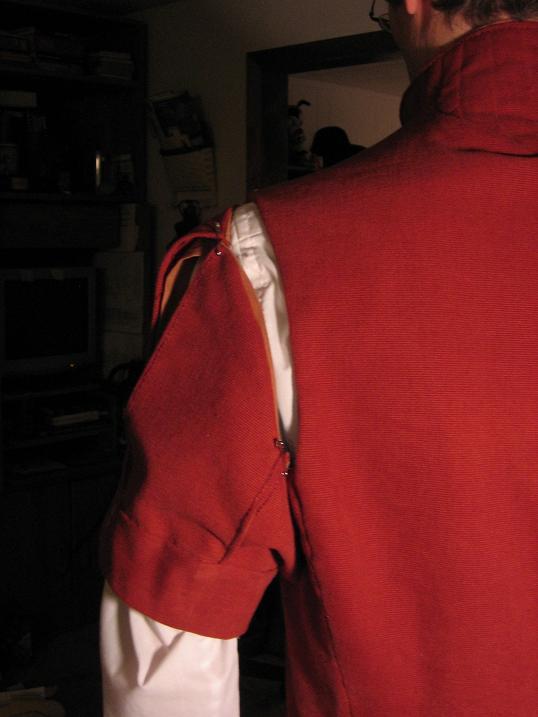
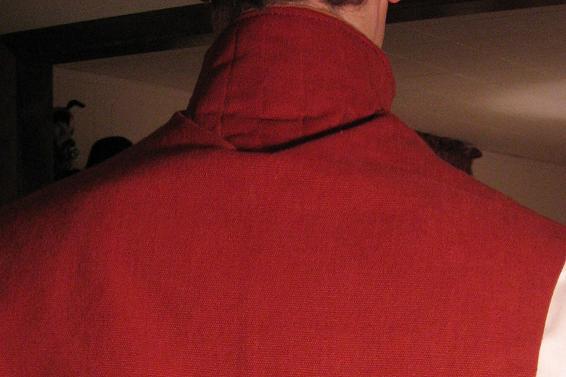
Shoulder back
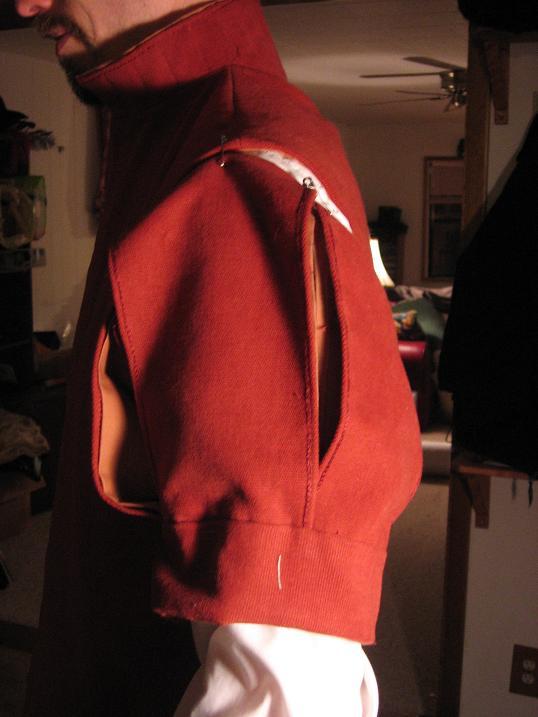
Shoulder profile
I'm pleased so far with the similarities with the jerkin in the painting. There is a small issue at the back of the neck, however. It is possible that partially quilting might not work in the long-run. The point where the quilting stops has a pucker that just won't go away. I'm still looking for solutions to this (other than quilting the whole damn thing, of course). Maybe some of that cheap ultra-flexible boning they sell at fabric stores or some broom straw or something... I'm sure I'll figure it out eventually.
No matter how many times you've done this, the course of sewing garb never runs completely smooth.
No comments:
Post a Comment